I don't remember how I came across paper-cut illustrations, I imagine it was either on Pinterest or when looking for more work by Disney artist Brittney Lee (she is featured in the book The Art of Frozen. If you are looking for some eye-candy, her blog and Etsy shop are really inspiring!).
Over the past few months, I've been doing bits and pieces of things, experimenting, and just trying to learn as I go. It has really been a lot of fun for me because it takes drawing into the 3rd dimension. The main challenge I've faced has been getting a good dimensional relationship among the different paper pieces in order to achieve a sense of depth. You really have to think about how you are going to put the pieces together before you start cutting up paper.
A great thing about paper-cutting is that it's a very inexpensive medium to take up... you can get started with just paper, scissors, and glue! Of course, as you keep at it you'll want to move beyond the basics. My current collection of tools has grown substantially!
- Paper: I've been using card stock but any paper is fine. If you want your creation to last a bit longer, opt for acid-free paper.
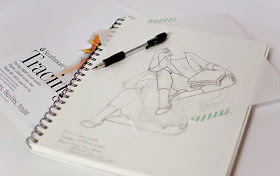
- Tracing paper or light box: You can use either tracing paper or a light box to transfer your image to the paper. I've been using tracing paper to copy my original drawing. I then use the tracing paper to transfer the drawing onto the card stock. A light box would allow you to skip the step of copying your original drawing and let you transfer your image directly onto the card stock. A light box is on my wishlist!
- Knives, blades, and scissors: Cutting instruments. I have found that moving the paper instead of the cutting instrument will give you a smoother edge. It takes a bit of practice but the results are worth it.
- Self-healing cutting mat: This is used to protect the surface of your work area when using the X-acto knife and also helps extend the life of the blades. The mat requires a little time to heal from the action of the blade, so it's a good idea to move your work to a different area of the mat every so often. In a pinch you could use a piece of cardboard as a mat.
- Metal ruler: Used when cutting straight lines with the X-acto knife.
- Tweezers: Helpful when placing small paper bits.
- Acid-free craft glue, 3D foam squares: Used to connect the paper pieces together. The 3D foam squares will elevate one paper piece in relation to the other, giving a sense of depth. The same effect can be achieved by gluing a tiny folded piece of paper (or even tiny pieces of paper glued one on top of the other) under your paper-cut piece.
- Burnisher: The cut paper is going to have a nice sharp edge to it. I like a more rounded edge to give a very subtle illusion of depth, so I run the burnisher over the edges of my paper-cut pieces. It can also be used to curl strips of paper.
- Gouache paint, paintbrushes, and palette knife: Paper comes in all sorts of colors but sometimes you just can't find the exact color you want. In comes paint! Gouache is opaque and renders itself nicely for covering colored paper.
Now onto the project! I wanted to do a curly-haired girl sitting down with her sketchbook daydreaming about what she was going to draw. Later, I want to populate her daydream and give her a background to live in, but for the time being I wanted to focus on the girl. So I made a sketch and copied it onto a piece of tracing paper.
Then I got busy transferring each part of the girl onto the different colored papers I wanted to use. As I cut out different parts I like to lay them on top of each other to see if everything is fitting together nicely.
The hair was A LOT of fun to do, but there were so many small pieces to it that I decided to glue everything in place before fate had a chance to have some fun with me. I painted the pale yellow paper a flesh tone and added all the facial features.
Then I got busy working on the body, clothes, and sketchbook. Before painting and gluing, I placed all the pieces together to check how everything fit together.
I was really happy with the final piece! Now, what is she daydreaming about?


No comments:
Post a Comment