But you may have an illustration that does not fall into one of the commonly available frame sizes: 5 x 7, 8 x 8, 8 x 10, 10 x 10, 11 x 14, 12 x 12, and 16 x 20. In this case, you could go the route of a custom frame...
But, I'm going to show you how to make a store bought frame work in this case as well. It just takes a little work and a nice sheet of poster board. For this tutorial I will be using my Summer Days illustration which is 10 x 12 inches.
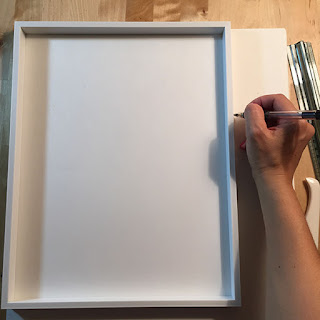
So here's the problem... I purchased an 11 x 14 shadow box frame for my illustration. As you can see in the picture, the illustration just swims around inside the frame... So there are a few things to point out here:
- The inner frame is too far away from the illustration to serve as a the shadow box (check out the Easy Method for more on this). We will need to make one out of poster board to fit the dimensions of the illustration.
- Even if we make a shadow box that fits around the illustration, it will still bounce around inside the frame. So we will need to attach the illustration to something that will center it inside the frame.
- Since the illustration is smaller than the frame, there will be some empty space around the illustration which really takes away from the main subject. So we will need to make something to hide this empty space.
1 - Making a Paper Shadow Box
A shadow box should hug a cut paper illustration on all sides. In the Easy Method I used the inner frame of store bought shadow box for this. But as we saw above, the inner frame is too big for the illustration and cannot be used in the same way.
One solution is to make a shadow box out of poster board and place the illustration inside of it. I purchased a nice sheet of poster board for this since it is going to be glued to the illustration (I wanted the poster board to be acid-free and of an overall better quality than the cheaper poster board often used for school projects). As luck would have it, I bought it on a windy day and struggled to get it to the car without letting it bend (crafting is stressful business...).
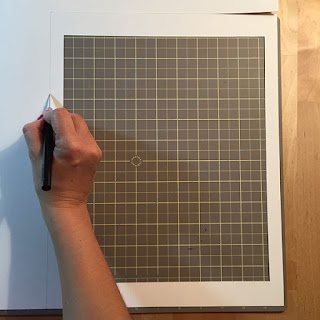
The 11 x 14 shadow box frame holds objects up to 3/4 inch deep so the height of the paper shadow box can be no larger than 3/4 inch. I outlined my illustration on the poster board and kept a 3/4 inch border on all sides. I cut out the larger rectangle and then scored the outline of my illustration with my bone folder.
I erased the outline and was left with the scored outline of the illustration. The scored lines show me where I have to fold the paper, but before folding, the corners need to be clipped. Pick a scored line and follow it to a corner, take a pencil and extend the line from the scored corner to the edge of the paper. Now follow the scored line perpendicular to the previous line, from the corner to the next corner and again, using a pencil, extend the line to the edge of the paper. Do this two more times and you should end up with four lines, each 3/4 inch long. Cut on these pencil lines (do not cut the scored lines).
Now the paper can be folded. Fold all four sides of the paper upwards along the scored lines. Fold over the 3/4 inch excess at the ends (this is how we will get neat corners and is the reason we clipped the paper in the previous step).
Glue the corners shut. The paper shadow box is done!
Glue the illustration inside the shadow box.
So the paper shadow box is done but we still have the problem of the illustration swimming around inside the frame... Not to mention all the empty space that would appear if we were to close the frame now.
2 - Mounting the Paper Shadow Box
To center the illustration inside the shadow box frame, I decided to use a piece of poster board. I started by outlining the inner frame (11 x 14) of the shadow box frame onto a sheet of poster board. Then I cut out the poster board rectangle.
I centered the illustration + paper shadow box inside the poster board rectangle (mounting board) and outlined them.
I glued the illustration + paper shadow box onto the mounting board. Now the illustration will be centered in the shadow box frame.
3 - Making a Paper Frame
For a nice finished look and to hide the empty space inside the frame, I added a paper frame around the illustration made out of poster board (you could also use watercolor paper). To make this paper frame, start by outlining the inner frame onto the poster board. The dimensions of this rectangle are 11 x 14 inches.
Then decide how much of the illustration you wish to overlap with the paper frame. I wanted the overlap to be 1/8 inch. But here you also have to account for the difference between the 11 x 14 frame and the 10 x 12 illustration. There is a 2 inch difference on the vertical axis and a 1 inch difference on the horizontal axis. These differences have to divided between the two borders on each axis... this is sounding complicated but all you have to do is have a 1 1/8 inch border on the top and bottom (1 inch for the difference and 1/8 inch for the overlap) and a 5/8 inch border on the left and right (1/2 inch for the difference and 1/8 inch for the overlap). This is what mine looked like.
Cut out the center rectangle.
Then cut out the frame. I wanted a smooth edge on the inner border so I ran my burnishing tool all around it.
4 - Putting it all together!
Using a hot glue gun, I glued the paper frame I just finished in the previous step to the inner frame. You only need a few dots here and there.
I then placed the inner frame back into the shadow box frame with the paper frame touching the glass.
Finally the illustration (with its paper shadow box and mounting board) was placed inside the frame and I closed the back.
All done!


No comments:
Post a Comment