Wednesday, September 23, 2015

The Basilica of St. Lawrence in Asheville, NC

In August we traveled to western North Carolina and decided to spend one afternoon exploring Asheville. We spent the few hours we had in the colorful and vibrant Downtown Arts District (complete with street performers playing Bluegrass music!). While walking around, we happened upon the beautiful Basilica of St. Lawrence. There has never been a church built that I didn't want to explore, so in we went! 

The Basilica had a very informative pamphlet at the main entrance so I'll be able to share a few interesting aspects of the Basilica along with some pictures! It was completed in 1909 and is a National Historic Site. The entire structure was built without a single beam of wood or steel! Only tile and other similar materials were used in its construction. (For more information, visit the Basilica's official website.)

Angle view of the brick exterior of St Lawrence Basilica in Asheville North Carolina

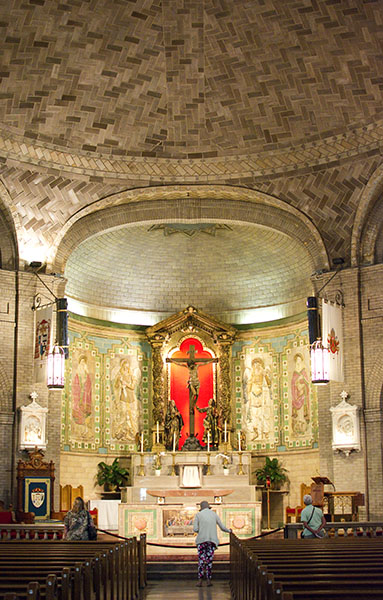
The interior is beautifully serene... One of the Basilica's main features is the dome that spans the entire nave and is considered to be the largest freestanding dome in North America. 

Atmospheric interior of St. Lawrence Basilica with parishioners admiring the splendor

Red altar of St. Lawrence Basilica with lady paying reverence to the crucified Christ

At the center of the main altar is the Crucified Christ with statues of his mother, Mary, and his beloved disciple, John, at the base of the cross. On both sides of the crucifixion scene are life size reliefs of the four evangelists and Archangels Michael and Raphael. The picture below shows, from left to right, Matthew (represented by the praying angel), Mark (represented by the lion), and Archangel Michael (defeating the devil with his sword).

Crucified Christ against a red background with the Virgin Mary and St. John at the foot of the cross

Wall carved images of evangelists Matthew and Mark and the archangel Michael

There are two large stained glass windows on either side of the nave, the one below depicts Jesus healing the sick.

Brilliant stained glass window depicting Jesus healing the sick against a dark church background

Cross and rose carved into the worn wooden pew of St. Lawrence Basilica with a strongly lit stained glass window in the background

As with the pews (above), the floors are embellished with crosses. A blood red cross is located at the base of the steps leading up to the main altar and, in the chapels, the stone tiles were placed in a cross pattern. (I love all the details!)

Mosaic of a red cross on a church floor with cracks

Cross pattern using rectangular stones on the church floor with smaller green tiles

Along the walls of the nave are niches with life size statues of St. Peter (pictured below), St. Cecilia, St. Patrick, and St. Rose of Lima. These statues flank the large stained glass windows.

Statue of St Peter holding the keys of Heaven in his left hand and summoning the people with his right

There are also two chapels: Eucharistic Adoration Chapel and Chapel of Our Lady. The latter is decorated in a beautiful light blue tile with an altar holding white marble statues of Our Lady of the Assumption and two angels.

Atmospheric lighting provided by a single candle which illuminates a carved cherub

Serene light blue chapel withe image of Our Lady, Mary, at the center flanked by kneeling angles and framed by 7 doves

At the entrance of the Chapel of Our Lady is an ornately decorated baptism font. On its top is the depiction of Jesus' baptism in the River Jordan at the hands of John the Baptist.  

Ornately sculpted white holy water font with sculptures showing a kneeling Jesus being baptized by John the Baptist

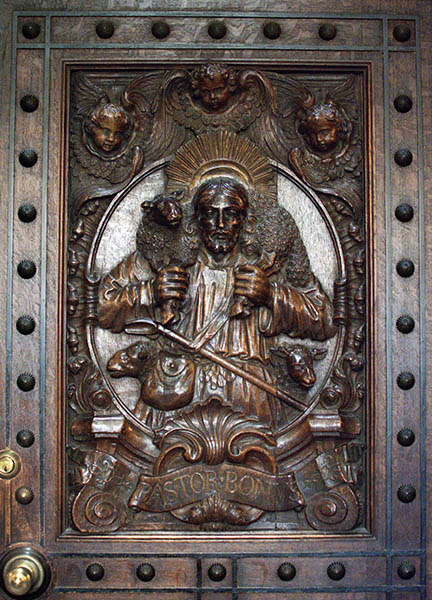
Hand carved wood door showing Jesus Christ carrying a sheep across his shoulder with the words Pastor Bonus carved below

I hope we get another chance to visit Asheville and explore more of this beautiful city! (While we were driving around, I spotted an very interesting church near the Biltmore Estate... Maybe on our next trip!)

Can you tell I love visiting churches? If this post left you wanting more pictures of magnificent churches, check out Notre-Dame Basilica in Montreal and Saint-Anne-de-Beaupre just outside Quebec City.

Wednesday, September 16, 2015

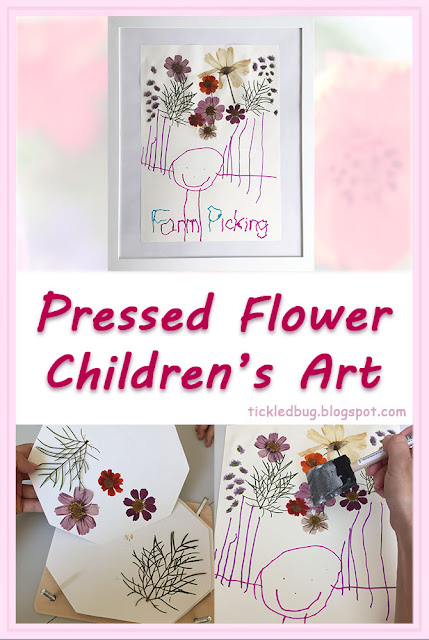
Pressed Flower Children's Art

Tickled by the Creative Bug - Pressed Flower Children's Art

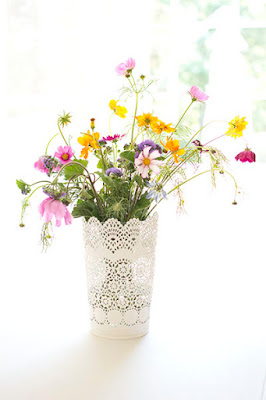
We are on the brink of fall around here, but I couldn't help sharing this cute little pressed flower art project! Last month we visited a local farm and, besides all the yummy food we got, we also picked some pretty wildflowers. Our daughter loved loved loved the whole experience and dubbed it "Farm Picking" (kids come up with the best names for things!).

Tickled by the Creative Bug - Colorful wildflowers in a white vase against a bright white backgroundTickled by the Creative Bug - Colorful wildflowers in a white vase against a bright white background

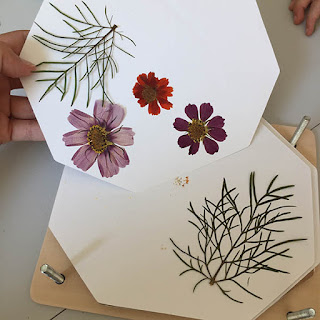
The flowers lasted a surprisingly long time, but when they were about to start wilting, my daughter and I clipped some of them and placed them in her flower press. It had been a birthday present and it was the first time we used it. She was really excited to see the flowers and asked almost every day if it was time to open the press. I'm so proud at how patiently she waited for the flowers to dry (we left them in for about 2 weeks... an eternity for a little kid).

Tickled by the Creative Bug - Wooden flower pressTickled by the Creative Bug - Revealing pressed wildflowers and leaves inside a wooden flower press

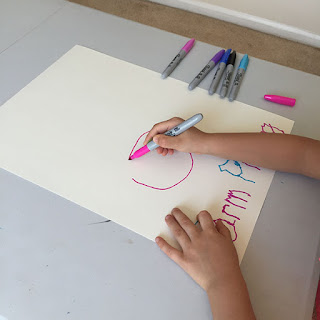
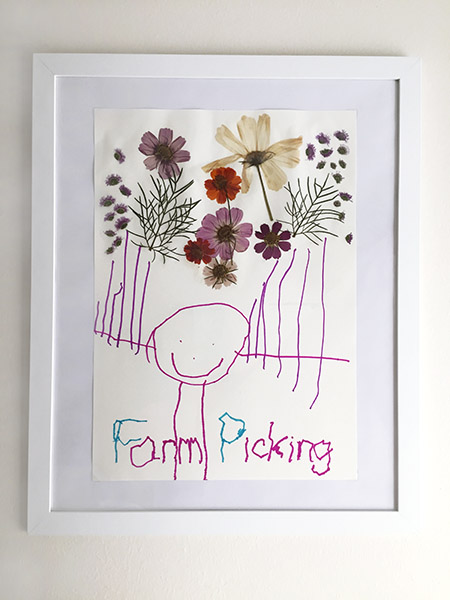
Although she still prefers abstract and process art, she has started drawing adorable portraits, so I asked her to draw herself holding a bouquet of flowers (but only draw the stems). I also had her trace "Farm Picking" at the bottom of the paper.

Tickled by the Creative Bug - Child drawing using Sharpie markersTickled by the Creative Bug - Child's drawing using Sharpie Markers with Mod Podge and flower press in background

Next we applied Mod Podge to the upper half of the paper and she carefully glued down her pressed flowers.

Tickled by the Creative Bug - Applying Mod Podge to child's artTickled by the Creative Bug - Gluing pressed flowers to a child's drawing

I carefully put a coat of Mod Podge over the flowers to seal them.

Tickled by the Creative Bug - Covering pressed flowers with a coat of Mod Podge to seal themTickled by the Creative Bug - Pressed flowers covered by a coat of wet Mod Podge sealant

I absolutely love how this turned out and it is already a favorite of mine! It's simple but so sweet.  It can be used for many different occasions, for example, a Mother's day gift, a card to a grandparent, a keepsake from a walk or your garden, a get well card, etc.  And you can use any pressable flower you like (basically one that is not thick and juicy - to avoid mold), either store bought or picked fresh from your garden or local farm.

Tickled by the Creative Bug - Pressed flowers with child's drawing

Wednesday, September 9, 2015

Colored Pencil Inspired Cork Board DIY

 Cork bulletin board painted to look like the tops of colored pencils hanging on the wall with papers pinned to it

I needed a cork board... As I mentioned in a previous post, I am a collector of papers, I will keep anything that catches my eye. The problem is finding a place for my treasures that will keep them alive in my mind (the final destination of most of my papers is in piles on my desk or stuffed in a sketchbook). So a cork board seemed like a good solution for me! 

I found some hexagon shaped cork board tiles while at Target and the wheels in my mind immediately started spinning and thinking of ways I could personalize them for my little creative corner. 

I noticed that when you look at the tops of colored pencils, they are hexagons and I thought that a colored pencil cork board would be just perfect for our office. I also think it would look great in a studio space, a child's art corner (to hang up their masterpieces), or in a teenager's room.

This is a really quick and easy DIY, all you need are the cork board tiles and some acrylic paint in your favorite colors. You can use either a foam brush or paintbrushes to apply the paint. The glitter glue is optional (I wanted to add a little sparkle here and there!). 


I made a paper template to mark off the areas to paint (the outer edges and the circle). I traced the template onto the cork board tile with a pen. You don't need to make a template, just find something round, like a cup or bowl and trace its rim in the center of the cork tile.


Then it was just a matter of painting all the cork board tiles! When the paint was dry, I added a little glitter glue to some of the circles for a bit of sparkle.


And here it is!


I used 7 cork board tiles and arranged them like a color wheel. I love it, but I keep thinking it would be fun to add a bunch more and make it look like a large stack of colored pencils! Or cut them to fit a frame (or even just paint a sheet of cork board to look like colored pencils). We'll see what this evolves into (especially if I end up needing more space to pin stuff up)!

Wednesday, September 2, 2015

Traveling with Kids: Sticker Book Tip


We spent two wonderful weeks visiting my parents in North Carolina over the summer and got to visit a few places we hadn't been to before (I'll be sharing some pictures in another post!).  We usually travel by car and, I confess, it is a long ride... I usually spend a good amount of time in the weeks leading up to our trips preparing activities for our daughter to entertain herself in the car. One of my go-to activities is sticker books! What kid doesn't love stickers? And with Labor Day weekend just around the corner, they are a great activity for long car rides.

The stickers come lumped together on a few pages at the center or end of the books. In the past I would rip out the pages and patiently cut them with my tiny Swiss Army knife scissors while riding in the passenger seat. It was on an on-demand basis... our daughter would finish a page in the book and I would cut out the stickers for the next page. 

As I was packing up her activity bag for our latest road trip, I decided to cut out all the sticker pages in advance. I wanted to make the books easier for her to do by herself but I didn't like the idea of tucking the cut sticker pages inside the book (way too easy to fall all over the floor...).

Then I had the idea of sticking the sticker pages to their corresponding book pages! It was extremely easy to do and there was no chance of getting the stickers and book pages mixed up. It worked out great and our daughter did all her sticker books by herself!

One of the sticker books I had picked out was "Cats" from Phidal. I love the Phidal sticker books, they have a very wide selection (animals, numbers, colors, shapes, stories), the images and illustrations are engaging, the books are only 16 pages long (not overwhelming for young children), and are very affordable (I often find them on sale for under $1 apiece at Staples). I started by removing the center sticker insert.


I cut the sticker insert along the cut lines. I then had stickers for each page of the book.


I peeled back the sticker backing paper just up to the first stickers. I cut off a strip of the backing paper and pressed the sticker sheet back onto the backing paper.  


By clipping the backing paper, the sticker sheet now has a sticky strip that can be connected directly to the appropriate page of the sticker book.


The stickers are now conveniently attached to the page they belong to and they won't fall out when the book is moved around.  All our daughter had to do was pull off the sticker sheet and start working!


Safe travels!