Sunday, March 27, 2016

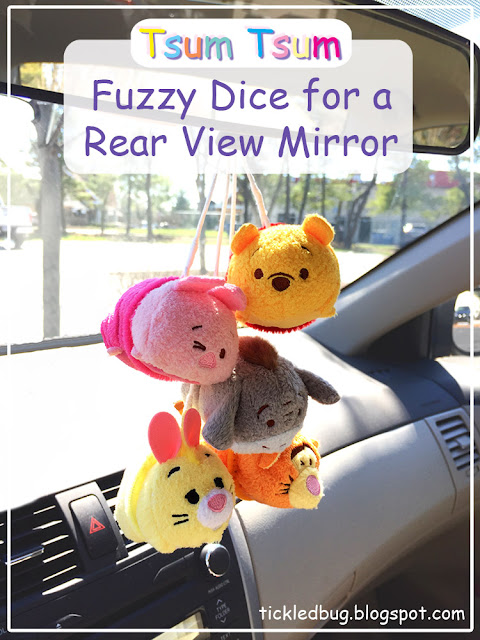
Tsum Tsum Fuzzy Dice for a Rear View Mirror

winnie the pooh piglet eeyore tigger rabbit disney tsum tsum characters fuzzy dice hanging from the rear view mirror of a car in the sunshine

I'm just going to come right out and say it... Tsum Tsums are absolutely adorable! Mixing Disney with Japanese kawaii/cuteness culture is just too much for me to resist...  My daughter is not too impressed by them but I can't help looking at all the new ones whenever we go to the Disney Store. I confess that I have bought a few for myself... not too many, but enough to get me thinking what the heck I'm going to do with them!

I'm not really a collector of things... I prefer when I buy something for it to have a function, to make my space prettier, or to just give me a giggle. The Tsum Tsums fall into the latter category and I needed to find a way to use them. (But if you or a little some one in your life does like to collect them, a really cute idea I loved was this Tsum Tsum storage display from The Pink Samurai. It almost made me wish I were collecting Tsum Tsums!... I might be in denial about the whole collecting thing.)

I then thought it would be really fun to have them in my car as fuzzy dice! They are the perfect size and, as an added bonus, they could be a great distraction for little hands on long car rides, just pop them off and toss them to the back seat!

Before I decided to do this "craft", I had no idea that fuzzy dice were called fuzzy dice. I had to look up the name based on my knowledge of the stuffed dice I remembered from the 80s. Much to my surprise, fuzzy dice actually have an interesting history behind them, as told in Dicing with Death: History of Fuzzy Dice. I never would have guessed it! Live and learn!

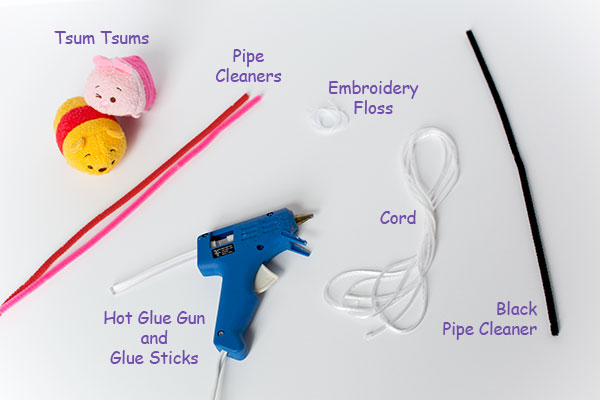
So, for this (I'm going to go with) whimsical craft, all you need is some cord, embroidery floss matching the color of the cord, pipe cleaners matching your Tsum Tsums, a pipe cleaner to attach to your rear view mirror (I chose black), hot glue gun, and, of course, your choice of Tsum Tsums (I went with the gang from the Hundred-Acre Wood but if I give in and buy more, the design would allow me to easily change them out).

eeyore piglet winnie the pooh tigger and rabbit disney tsum tsum characters in a row with colorful pipe cleaners

Winnie the pooh piglet disney tsum tsum characters with pipecleaners hot glue gun and cord

Measure how long you want your Tsum Tsums to hang from the rear view mirror and cut the cord accordingly. Cut a cord for each Tsum Tsum you want to use. Vary the length of the cords so the Tsum Tsums will be staggered.

Pink scissors measuring tape and cord on white background

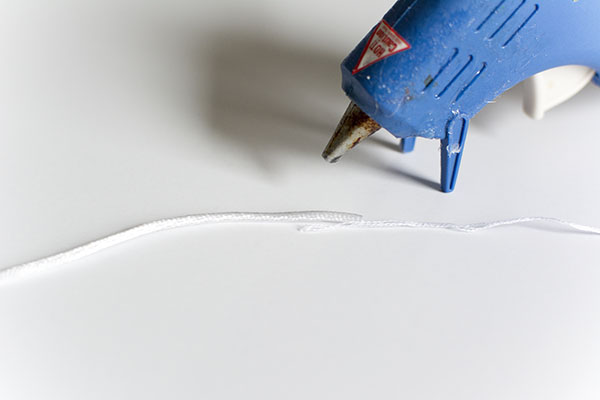
Hot glue the tips of the cord and the embroidery floss together.

blue hot glue gun with white cord

Loop the cord over itself and hot glue it in place.

Blue hot glue gun with white cord

Wrap the embroidery floss around the cord to secure the loop and hide the glue.


Form a loop at the top of one of the cords and glue all the cords together. Finish by wrapping the embroidery floss around the top to hide the glue.


Slide a pipe cleaner through one of the loops and twist it into a circle (the circle should fit securely around the body of the Tsum Tsum).


Repeat for all of the other loops.


Slide the black pipe cleaner through the top loop and attach it to the rear view mirror of your car.


Add the Tsum Tsums!

winnie the pooh piglet eeyore tigger rabbit disney tsum tsum characters fuzzy dice hanging from the rear view mirror of a car in the sunshine

My daughter absolutely loves the Tsum Tsum fuzzy dice hanging in our car (I may convert her yet! Then I can make the aforementioned cute storage display!!)! She gets a kick out of watching them swing! Now I might have a legitimate reason to buy the rest of The Little Mermaid characters...

Tuesday, February 16, 2016

Keeping Little Hands Warm in the Snow: Convert Snow Mittens into Long Mittens

Blue background with snowflakes and child wearing pink polka dot snow mittens

I grew up in beautiful, sunny, warm Brazil! I arrived in the States about 10 years ago in January. When I embarked on the plane in Brazil it was around 30oC (86oF) and when I landed in the States it was -30oC (-22oF)... It was a shock to say the least! I almost turned around to go back home... I seriously considered it...

I love winter now! I find myself eagerly awaiting the first snow fall along with my daughter. I love how the world magically transforms with the snow and ice and how the light is so different! But I admit that it took me a while to learn to really appreciate winter. Learning how to dress properly (Layers! Layers! Layers!) has been the main factor in my change of heart.

I am slowly venturing out to play more and more in the snow with my daughter (I even got myself a pair of snow pants!). But one thing that scares me is the way the snow gets packed in around her wrists... Then I freak out about frost-bite and we're back inside after 10 minutes! After the last big snowstorm I tried attaching her mittens to her coat with duct tape It worked well for a while but I wanted something more permanent. A few days later a friend of mine introduced me to long mittens (here is a pair on Amazon). Brilliant!
Since my daughter has a good pair of snow mittens I wanted to see if I could figure out a way to convert them into long mittens. The sleeves I wanted to add to them would have to be snug enough to cling to her arms but also stretchy. Then it hit me: socks!

All you need for this is:
  • Child's snow mittens
  • Adult mid-calf socks

This is my original sketch for the idea and it really couldn't be simpler: cut the foot part of the sock off and sew the top part to the mitten.

How to hand drawn black ink sketch of snow mitten and sock

Start by cutting the socks a little above the heel. Discard the foot part of the sock or save it for another project.

Slip the sock onto a bottle of water (I did this to stretch the sock in order to sew it properly to the mitten).

Black sock cut by pink scissorsBlack sock over water bottle

Pull the mitten onto the bottle and over the unfinished end of the sock.

Sew the sock to the mitten using a hemming stitch.

Needle sewing a pink polka dot snow mitten glove held by cute multi colored polka dot nail art

The sock is now attached to the mitten!

I ended up running it through my sewing machine, just for my own peace of mind (I found this kind of difficult to do because of the small circumference of the mitten opening and the volume of the sock...).


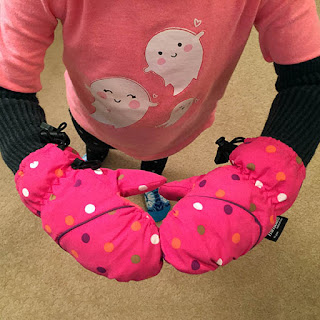
Time to have fun in the snow!

Child wearing home made long snow mittensChild holding white snow in the palm of a pink polka dot mitten

After making the long mittens I was looking around on the internet and discovered that I'm in good and plentiful company when it comes to snow mitten problems. Here are some great snow play tips:
  • Duct tape the mittens to the snow coat (The Kid Project)
  • After I made the long mittens I found a kindred mind who did exactly what I did! Check out Keep the Kids' Hands Warm with this Tip.
  • Great video showing how to layer and dress kids for the snow! (Nature for Kids)
  • Solutions for keeping kids from losing a mitten/glove in the snow... because you know you'll only ever find it again in the spring! (NJ Family)
  • Here is a good list of general guidelines for safe snow play (Parents.com)

Monday, January 25, 2016

How to Flip and Glue a Large Puzzle by Yourself

Process pictures of a how to on tickled by the creative bug blog flip and glue a large puzzle by yourself

I'm still alive and kicking! I had to take an unplanned hiatus from the blog for a while. Sometimes when life happens we just have to step back and concentrate our energies on what's happening. I hope to eventually get back to blogging once a week, we'll see how it goes.

I've been trying to finish projects that have been sitting around for a while (sometimes when I get a new idea, I get so excited about it that I stop the current project and start the new thing... the problem is getting back to the project I interrupted...).

A while back I made a framed puzzle mat for mounting a 4,000 piece puzzle. I had a plan for flipping it and gluing it, I was just waiting for it to be finished. So, during the week between Christmas and New Year's, I tested out my idea and it worked (phew!). And I did it all by myself!

What you will need for this project is

  • Clear contact paper
  • Mod Podge Puzzle Saver
  • Foam core boards
  • White glue (I used Elmer's glue)
  • Poster board (depends on how large the puzzle is and if you need to use multiple foam core boards)
The basic idea is to cover the puzzle with contact paper, flip it, and glue the foam core to the back of puzzle. So here is the completed puzzle still laying on the framed puzzle mat

Large puzzle of a soccer game laying on kitchen table

I started by covering the puzzle with contact paper. I rubbed the entire surface thoroughly to make sure every puzzle piece was sticking to the contact paper.

Process of applying contact paper to the surface of a large puzzle   Process of applying contact paper to the surface of a large puzzle

The puzzle can now be lifted right off the framed puzzle mat and the pieces stay together. To be honest, this made me a bit nervous so I put the puzzle back down onto the framed puzzle mat, picked up the mat and leaned it against the back of my sofa.
  
Lifting a large puzzle by a corner to show that the contact paper holds all the puzzle pieces in place   Puzzle covered with contact paper leaning against a red sofa

(If you don't have a framed puzzle mat, you can slide the puzzle covered with contact paper onto a large piece of plywood or cardboard to stand it up. Just make sure to hold the top of the puzzle as you stand it up. Or, if you are braver than me or have a smaller puzzle, you can just lift the puzzle off the surface and flip it over once the contact paper has been applied thoroughly to the surface of the puzzle.)

I then pushed the puzzle, mat and all, over onto the floor. (Here you can see the reinforcements I added to the bottom framed puzzle mat -- I mentioned them in my previous post but didn't have a picture at the time.) I lifted the framed puzzle mat and viola! a flipped puzzle in one piece!

Framed puzzle mat made out of cardboard and craft foam laying face down on the floor   Large puzzle laying face down on a carpeted floor with a rainbow colored framed puzzle mat standing behind it

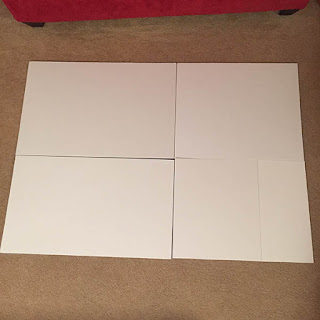
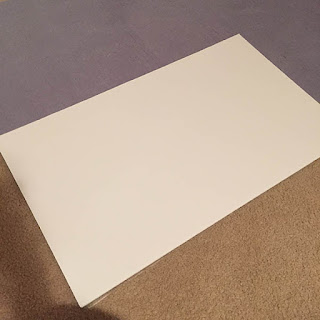
Next I determined how many foam core boards I needed to cover the entire back of the puzzle and cut them down to size (this puzzle measures approximately 53 9/16 in x 37 13/16 in). But before gluing the foam core boards to the puzzle, I covered the entire back of the puzzle with Mod Podge Puzzle Saver. Be careful not to soak the puzzle with the Mod Podge so it doesn't seep through the cracks and glue to the contact paper.

White foam core boards cut down to size to fit the back of a large puzzle   Foam brush applying glue to the back of a large puzzle

Apply white glue to the entire foam core board and glue it in place. You can place some heavy books on top of it to help it glue. Do this with all the foam core boards.

Foam brush applying glue to a white foam core board   Gluing a white foam core board to the back of a large puzzle

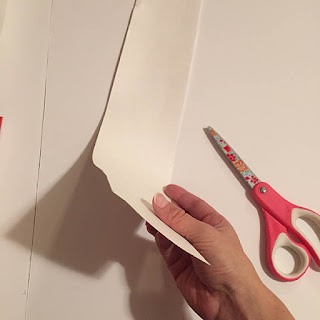
Next cut strips of poster board to cover the junctions where the foam core boards meet. Glue the strips in place.

Cutting strips of white poster board with pink scissors   Gluing white poster board to white foam core board

This is what the back of the puzzle will look like once everything is glued in place.

White foam core board glued to the back of a large puzzle   White foam core board glued to the back of a large puzzle

Allow everything to glue for about a half of an hour, then flip the puzzle over again. Remove the contact paper.

Removing contact paper from the front of a large puzzle   Large wad of crumpled contact paper after it was removed from the surface of a large puzzle

All done! I strongly suggest to put some weights on the puzzle and allow it dry for a few days, so that it won't warp. I placed the discarded backing of the contact paper on the puzzle (just in case any glue seeped through) and covered the puzzle with books.

Puzzle surface covered with contact paper backing   Variety of books acting as weights for a puzzle gluing to foam core boards

Now the puzzle is ready for framing or you can put it up on the wall as is (the foam core boards are firm but light weight).

Cute west highland white terrier westie sitting pretty in front of a large green soccer themed puzzle