Showing posts with label summer. Show all posts

Wednesday, September 16, 2015

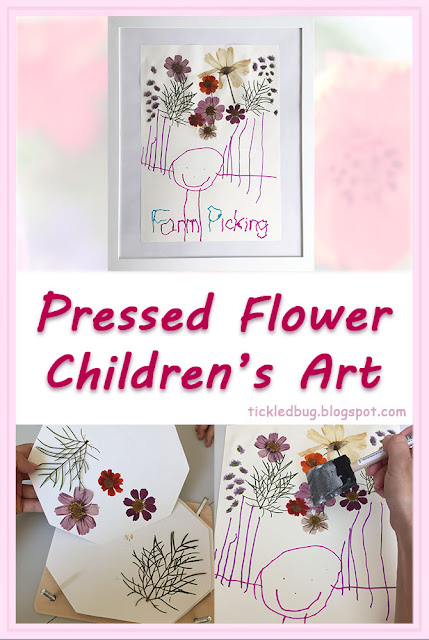
Pressed Flower Children's Art

Tickled by the Creative Bug - Pressed Flower Children's Art

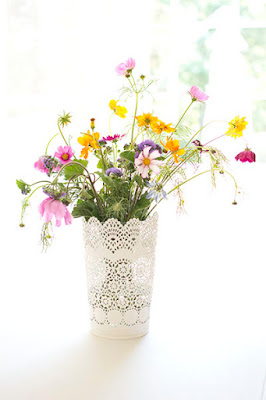
We are on the brink of fall around here, but I couldn't help sharing this cute little pressed flower art project! Last month we visited a local farm and, besides all the yummy food we got, we also picked some pretty wildflowers. Our daughter loved loved loved the whole experience and dubbed it "Farm Picking" (kids come up with the best names for things!).

Tickled by the Creative Bug - Colorful wildflowers in a white vase against a bright white backgroundTickled by the Creative Bug - Colorful wildflowers in a white vase against a bright white background

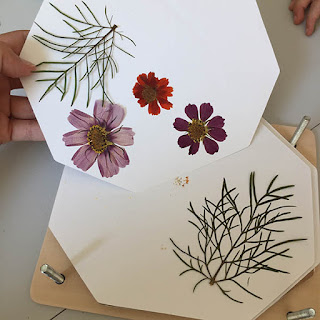
The flowers lasted a surprisingly long time, but when they were about to start wilting, my daughter and I clipped some of them and placed them in her flower press. It had been a birthday present and it was the first time we used it. She was really excited to see the flowers and asked almost every day if it was time to open the press. I'm so proud at how patiently she waited for the flowers to dry (we left them in for about 2 weeks... an eternity for a little kid).

Tickled by the Creative Bug - Wooden flower pressTickled by the Creative Bug - Revealing pressed wildflowers and leaves inside a wooden flower press

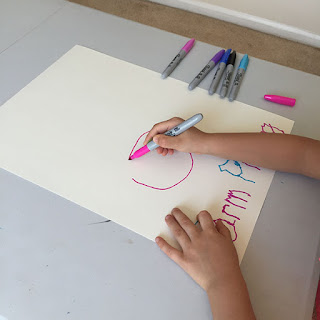
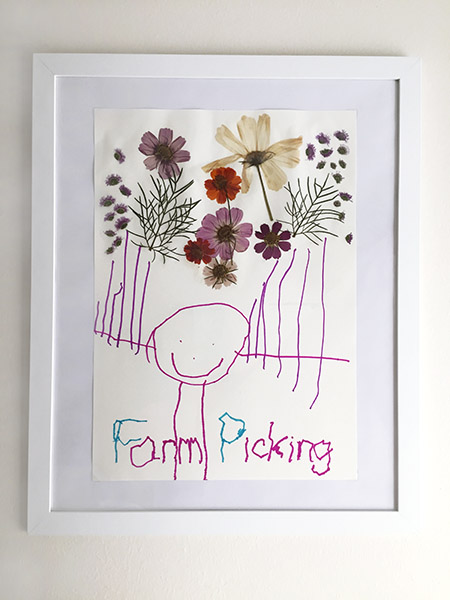
Although she still prefers abstract and process art, she has started drawing adorable portraits, so I asked her to draw herself holding a bouquet of flowers (but only draw the stems). I also had her trace "Farm Picking" at the bottom of the paper.

Tickled by the Creative Bug - Child drawing using Sharpie markersTickled by the Creative Bug - Child's drawing using Sharpie Markers with Mod Podge and flower press in background

Next we applied Mod Podge to the upper half of the paper and she carefully glued down her pressed flowers.

Tickled by the Creative Bug - Applying Mod Podge to child's artTickled by the Creative Bug - Gluing pressed flowers to a child's drawing

I carefully put a coat of Mod Podge over the flowers to seal them.

Tickled by the Creative Bug - Covering pressed flowers with a coat of Mod Podge to seal themTickled by the Creative Bug - Pressed flowers covered by a coat of wet Mod Podge sealant

I absolutely love how this turned out and it is already a favorite of mine! It's simple but so sweet.  It can be used for many different occasions, for example, a Mother's day gift, a card to a grandparent, a keepsake from a walk or your garden, a get well card, etc.  And you can use any pressable flower you like (basically one that is not thick and juicy - to avoid mold), either store bought or picked fresh from your garden or local farm.

Tickled by the Creative Bug - Pressed flowers with child's drawing

Wednesday, August 26, 2015

Tutorial: Framing Cut Paper Illustrations


In my last post I shared an Easy Method to frame a cut paper illustration using a store bought shadow box frame. The secret there was to plan the illustration around the dimensions of the chosen frame.

But you may have an illustration that does not fall into one of the commonly available frame sizes: 5 x 7, 8 x 8, 8 x 10, 10 x 10, 11 x 14, 12 x 12, and 16 x 20. In this case, you could go the route of a custom frame...

But, I'm going to show you how to make a store bought frame work in this case as well. It just takes a little work and a nice sheet of poster board.  For this tutorial I will be using my Summer Days illustration which is 10 x 12 inches.

So here's the problem... I purchased an 11 x 14 shadow box frame for my illustration. As you can see in the picture, the illustration just swims around inside the frame... So there are a few things to point out here:
  • The inner frame is too far away from the illustration to serve as a the shadow box (check out the Easy Method for more on this). We will need to make one out of poster board to fit the dimensions of the illustration.
  • Even if we make a shadow box that fits around the illustration, it will still bounce around inside the frame. So we will need to attach the illustration to something that will center it inside the frame.
  • Since the illustration is smaller than the frame, there will be some empty space around the illustration which really takes away from the main subject. So we will need to make something to hide this empty space.


1 - Making a Paper Shadow Box

A shadow box should hug a cut paper illustration on all sides. In the Easy Method I used the inner frame of store bought shadow box for this. But as we saw above, the inner frame is too big for the illustration and cannot be used in the same way.

One solution is to make a shadow box out of poster board and place the illustration inside of it. I purchased a nice sheet of poster board for this since it is going to be glued to the illustration (I wanted the poster board to be acid-free and of an overall better quality than the cheaper poster board often used for school projects). As luck would have it, I bought it on a windy day and struggled to get it to the car without letting it bend (crafting is stressful business...).

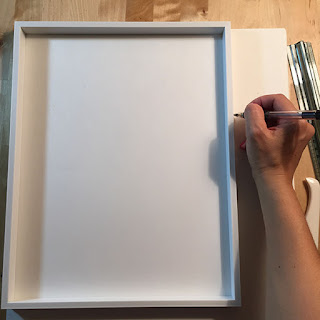
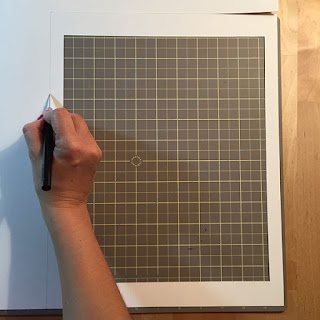
The 11 x 14 shadow box frame holds objects up to 3/4 inch deep so the height of the paper shadow box can be no larger than 3/4 inch. I outlined my illustration on the poster board and kept a 3/4 inch border on all sides.  I cut out the larger rectangle and then scored the outline of my illustration with my bone folder. 


I erased the outline and was left with the scored outline of the illustration. The scored lines show me where I have to fold the paper, but before folding, the corners need to be clipped. Pick a scored line and follow it to a corner, take a pencil and extend the line from the scored corner to the edge of the paper. Now follow the scored line perpendicular to the previous line, from the corner to the next corner and again, using a pencil, extend the line to the edge of the paper. Do this two more times and you should end up with four lines, each 3/4 inch long. Cut on these pencil lines (do not cut the scored lines).


Now the paper can be folded. Fold all four sides of the paper upwards along the scored lines. Fold over the 3/4 inch excess at the ends (this is how we will get neat corners and is the reason we clipped the paper in the previous step).


Glue the corners shut. The paper shadow box is done!


Glue the illustration inside the shadow box.


So the paper shadow box is done but we still have the problem of the illustration swimming around inside the frame... Not to mention all the empty space that would appear if we were to close the frame now.


2 - Mounting the Paper Shadow Box

To center the illustration inside the shadow box frame, I decided to use a piece of poster board. I started by outlining the inner frame (11 x 14) of the shadow box frame onto a sheet of poster board. Then I cut out the poster board rectangle. 

I centered the illustration + paper shadow box inside the poster board rectangle (mounting board) and outlined them.


I glued the illustration + paper shadow box onto the mounting board. Now the illustration will be centered in the shadow box frame.


3 - Making a Paper Frame

For a nice finished look and to hide the empty space inside the frame, I added a paper frame around the illustration made out of poster board (you could also use watercolor paper). To make this paper frame, start by outlining the inner frame onto the poster board. The dimensions of this rectangle are 11 x 14 inches.

Then decide how much of the illustration you wish to overlap with the paper frame. I wanted the overlap to be 1/8 inch. But here you also have to account for the difference between the 11 x 14 frame and the 10 x 12 illustration. There is a 2 inch difference on the vertical axis and a 1 inch difference on the horizontal axis. These differences have to divided between the two borders on each axis... this is sounding complicated but all you have to do is have a 1 1/8 inch border on the top and bottom (1 inch for the difference and 1/8 inch for the overlap) and a 5/8 inch border on the left and right (1/2 inch for the difference and 1/8 inch for the overlap). This is what mine looked like.


Cut out the center rectangle.


Then cut out the frame. I wanted a smooth edge on the inner border so I ran my burnishing tool all around it.


4 - Putting it all together!

Using a hot glue gun, I glued the paper frame I just finished in the previous step to the inner frame. You only need a few dots here and there.


I then placed the inner frame back into the shadow box frame with the paper frame touching the glass. 


Finally the illustration (with its paper shadow box and mounting board) was placed inside the frame and I closed the back.

All done!


Sunday, June 7, 2015

Summer Days Cut Paper Illustration


I've always loved Volkswagen Beetles! I remember living in Sao Paulo as a kid and begging my mother for us to take the Beetle taxis. When we were older, my brother and I shared a 1985 light gray VW Beetle and I just loved moseying all over town in it! It had a few interesting quirks like an engine kill switch under the rear hood (anti-theft protection!) and it ran on sugarcane ethanol. It was a great car!


I was thinking about my old car and the beach the other day and just wanted to capture that bright, colorful, happy time in my life with a cut paper illustration. After making a rough sketch, I started work on the Beetle.


Since the illustration was about heading to the beach and the classic Beetles have no trunk space to speak of, I added a roof rack with all the essentials for a day at the beach! And finally, the driver.


I sketched out the background on my base paper, outlining the layers of sand dunes and roads, as well as the horizon line. I then cut out the sand dunes and roads, the ocean's layers of waves and foam, and the sun.


I wanted rays of sunshine to radiate across a big bright sky, so I first chose a position for the sun. Using a protractor, I then divided the circle into 24 parts, twelve 20 degree sectors (in orange) and twelve 10 degree sectors (in magenta). Inside the 20 degree sectors I added 15 degree sectors of yellow rays of sunlight.


I painted the sand and added some beach grass, then glued all the pieces together!

Summer days are finally here!


For more information on the tools I use, visit my post Paper-Cutting Tips and Daydreaming Girl.