Monday, January 25, 2016

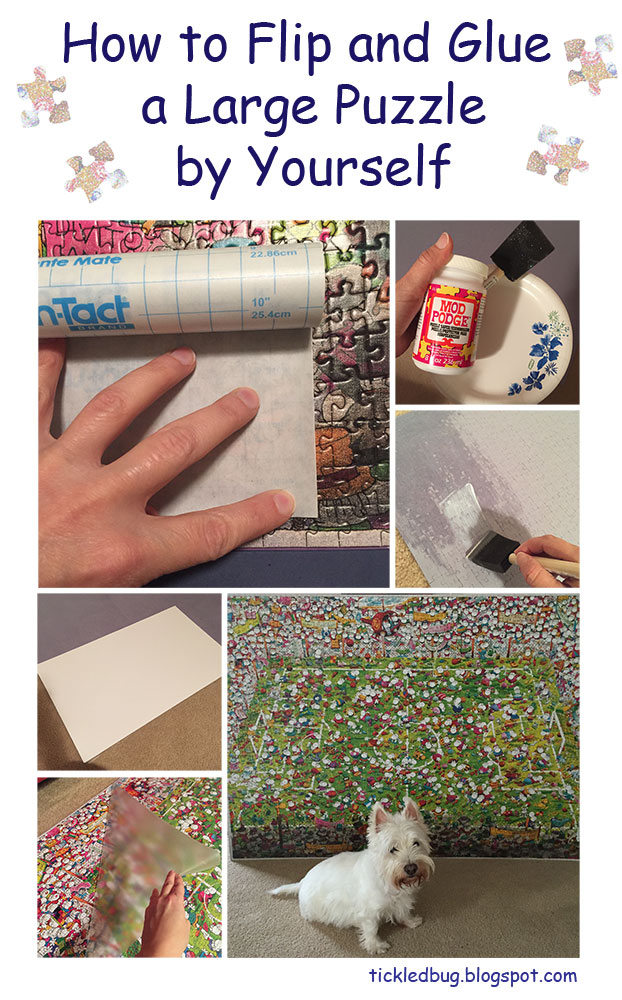
How to Flip and Glue a Large Puzzle by Yourself

Process pictures of a how to on tickled by the creative bug blog flip and glue a large puzzle by yourself

I'm still alive and kicking! I had to take an unplanned hiatus from the blog for a while. Sometimes when life happens we just have to step back and concentrate our energies on what's happening. I hope to eventually get back to blogging once a week, we'll see how it goes.

I've been trying to finish projects that have been sitting around for a while (sometimes when I get a new idea, I get so excited about it that I stop the current project and start the new thing... the problem is getting back to the project I interrupted...).

A while back I made a framed puzzle mat for mounting a 4,000 piece puzzle. I had a plan for flipping it and gluing it, I was just waiting for it to be finished. So, during the week between Christmas and New Year's, I tested out my idea and it worked (phew!). And I did it all by myself!

What you will need for this project is

  • Clear contact paper
  • Mod Podge Puzzle Saver
  • Foam core boards
  • White glue (I used Elmer's glue)
  • Poster board (depends on how large the puzzle is and if you need to use multiple foam core boards)
The basic idea is to cover the puzzle with contact paper, flip it, and glue the foam core to the back of puzzle. So here is the completed puzzle still laying on the framed puzzle mat. 

Large puzzle of a soccer game laying on kitchen table

I started by covering the puzzle with contact paper. I rubbed the entire surface thoroughly to make sure every puzzle piece was sticking to the contact paper.

Process of applying contact paper to the surface of a large puzzle   Process of applying contact paper to the surface of a large puzzle

The puzzle can now be lifted right off the framed puzzle mat and the pieces stay together. To be honest, this made me a bit nervous so I put the puzzle back down onto the framed puzzle mat, picked up the mat and leaned it against the back of my sofa.
  
Lifting a large puzzle by a corner to show that the contact paper holds all the puzzle pieces in place   Puzzle covered with contact paper leaning against a red sofa

(If you don't have a framed puzzle mat, you can slide the puzzle covered with contact paper onto a large piece of plywood or cardboard to stand it up. Just make sure to hold the top of the puzzle as you stand it up. Or, if you are braver than me or have a smaller puzzle, you can just lift the puzzle off the surface and flip it over once the contact paper has been applied thoroughly to the surface of the puzzle.)

I then pushed the puzzle, mat and all, over onto the floor. (Here you can see the reinforcements I added to the bottom framed puzzle mat -- I mentioned them in my previous post but didn't have a picture at the time.) I lifted the framed puzzle mat and viola! a flipped puzzle in one piece!

Framed puzzle mat made out of cardboard and craft foam laying face down on the floor   Large puzzle laying face down on a carpeted floor with a rainbow colored framed puzzle mat standing behind it

Next I determined how many foam core boards I needed to cover the entire back of the puzzle and cut them down to size (this puzzle measures approximately 53 9/16 in x 37 13/16 in). But before gluing the foam core boards to the puzzle, I covered the entire back of the puzzle with Mod Podge Puzzle Saver. Be careful not to soak the puzzle with the Mod Podge so it doesn't seep through the cracks and glue to the contact paper.

White foam core boards cut down to size to fit the back of a large puzzle   Foam brush applying glue to the back of a large puzzle

Apply white glue to the entire foam core board and glue it in place. You can place some heavy books on top of it to help it glue. Do this with all the foam core boards.

Foam brush applying glue to a white foam core board   Gluing a white foam core board to the back of a large puzzle

Next cut strips of poster board to cover the junctions where the foam core boards meet. Glue the strips in place.

Cutting strips of white poster board with pink scissors   Gluing white poster board to white foam core board

This is what the back of the puzzle will look like once everything is glued in place.

White foam core board glued to the back of a large puzzle   White foam core board glued to the back of a large puzzle

Allow everything to glue for about a half of an hour, then flip the puzzle over again. Remove the contact paper.

Removing contact paper from the front of a large puzzle   Large wad of crumpled contact paper after it was removed from the surface of a large puzzle

All done! I strongly suggest to put some weights on the puzzle and allow it dry for a few days, so that it won't warp. I placed the discarded backing of the contact paper on the puzzle (just in case any glue seeped through) and covered the puzzle with books.

Puzzle surface covered with contact paper backing   Variety of books acting as weights for a puzzle gluing to foam core boards

Now the puzzle is ready for framing or you can put it up on the wall as is (the foam core boards are firm but light weight).

Cute west highland white terrier westie sitting pretty in front of a large green soccer themed puzzle

Friday, November 6, 2015

InkTober Roundup!

I've been on Instagram for a few months and I just love it! During the month of October, artists from all around the world take on the challenge of doing one ink drawing a day. Jake Parker came up with the idea in 2009 as a way to improve his inking skills and he named the challenge InkTober. 

Let me tell you, it really is a challenge! It took a lot of discipline on my part to draw consistently every day (I think the last time I drew this much was before our daughter was born!). I've been feeling a bit rusty but it feels so good to be back at the table with my sketchbook and pencil (and in the case of last month, my ink brush!). It really is an ideal way for me to unwind at the end of the day! I hope to keep up the habit (you need 30 days to create a habit, right?!).

I've selected some of my favorite drawings I posted on Instagram from InkTober! I seemed to alternate among a few themes:

Halloween
Watercolor and ink drawing of a white candy skull catBlack and white ink drawing of a kitty witch riding a broomstick

Watercolor and ink drawing of a kitty cat jack-o-lantern with a blue cat looking overBlack and white ink drawing of a candy skull owl

Black and white ink drawing of Dracula vampire enjoying a glass of wine blood with three batsInk and colored pencil drawing of a gothic girl with purple hair dressed in a top hat and faux fur capelet with skull and crossbones pin


Mermaids
Ink and blue colored pencil drawing of a dreamy beautiful mermaid swimming in loopsInk and red colored pencil drawing of a mermaid enchanting the seas with her song

Ink drawing of a mermaid sea witch riding a coral and seaweed broomstick through the waterBlack and white ink drawing of a coy sexy mermaid


Lunchbox Notes
Ink and marker drawing of a very excited cartoon bee for a lunchbox noteInk and marker drawing of a cute and happy purple Eeyore for a lunchbox note

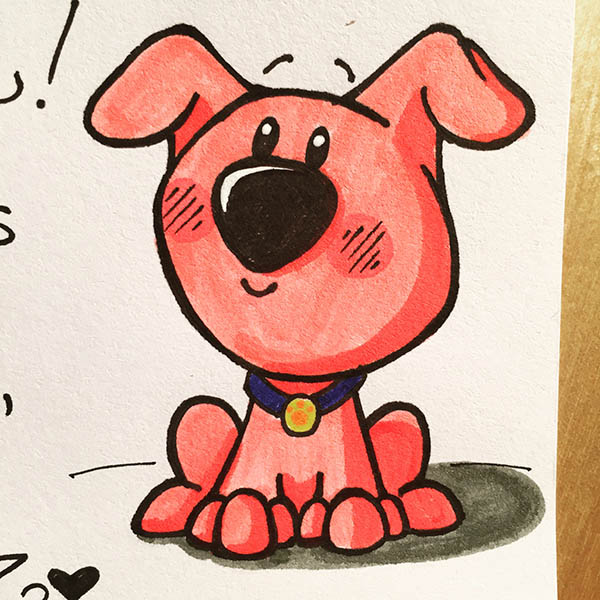
Ink and marker drawing of a cute and smiling pink puppy dog for a lunchbox noteInk and watercolor drawing of a smiling and sly little fox pup for a lunchbox note


Everyday Life
Black and white ink drawing of a little girl in a raincoat and rainboots happily and excitedly jumping in rain puddle during a rain stormBlack and white in drawing of a smiling little girl dressed like a princess in a ballgown and tiara


Animals and People
Ink and colored pencil drawing of a proud and smiling little black and white kitty cat with a red collarInk and red colored pencil drawing of a unicorn with windswept mane looking off into the distance

Black and white ink drawing of a rat mouse holding its tail after having been snapped pinched by a mousetrapBlack and white ink drawing of a magician in a robe and tall cone hat at a podium teaching a magic lesson

Black and white drawing of a geisha girl with long black hair and fans in her hair, dressed in a full gown with a white cherry blossom patternInk and colored pencil drawing of Little Red Riding Hood meeting a charming spider who offers her a blue flower

I actually still have to finish my 31st drawing (I fell a little behind because of preparations for Halloween!). If you'd like to follow along on my drawing fun, click here to check out my Instagram feed! For any inquiries about the drawings, please, email me!

Friday, October 30, 2015

Easy DIY Spider Web Trick or Treat Bags

Bright and colorful spider web trick or treat bags with black pom pom spiders dangling over their webs

This blog post is coming out sort of under the wire but I just had to share these quick and easy trick or treat bags that kids can make for Halloween night! I love the idea of hand made trick or treat bags! They can be personalized in so many different ways to match your child's costume or to just have fun with all the great Halloween imagery!

I came up with two designs for a spider web trick or treat bag. The first one is a really fun process art craft using bits of tissue paper and contact paper. This process is used a lot to make pretty suncatchers and "stained glass" art.

Trick or treat bag made with shades of purple and green tissue paper with cute black spider on a white web with large orange letters spelling trick or treat

The second design uses white crayon to create a watercolor resist spider web (here is a spider web craft using oil pastel: Oil Pastel Resist Spider Webs).

Spider web Trick or treat bag made using a white crayon as a watercolor resist with cute black spider with pink spots

To me, the spider is the finishing touch on the trick or treat bags. I love these dangling pom pom spiders because they give the bag some real bounce (and they are pretty darn cute, especially when dressed up a bit!)! If you are pressed for time or don't feel like pulling out the hot glue gun, you could also use spider stickers or cut out a paper spider and glue it to the bag.

Cute black pom pom spiders with googly eyes and felt embellishments to make crowns, spots and hearts. King queen princess prince spiders

All you need for this project are things you probably already have on hand... crayons, watercolors, tissue paper, contact paper, craft paint, and, of course, a paper bag. I used a plain white one but you can recycle, for example, an old birthday bag if you are making the contact paper bag.

White paper craft bag on light wood table


Watercolor Resist Trick or Treat Bag

You will only need two things for this bag: crayons and a set of watercolors.

White crayon, black and white paintbrush next to a colorful watercolor set

If your kids are very young, you can draw a spider web on the bag with a white crayon. Older kids can draw their own. I used white, but it would also be fun to use other crayon colors or several colors!  Just be mindful of the colors you choose... the beauty of the resist is in the contrast you get by keeping the paint off the areas with crayon (white is pretty much a fool proof color for this technique).

Paint, and paint, and paint until the bag is covered in beautiful watercolors! Layer the paints, splatter them, add some salt, go wild with any watercolor technique you like or can think of! Kids will love seeing the spider web "magically" appear on the bag with each brush stroke!

Drawing a white spider web onto a white craft bag with a white crayonPainting beautiful orange yellow and red watercolors onto a white craft bag revealing a white spider web

Allow the paint to dry and add a spider!

Cute black pom pom spider with pink felt spots on a beautiful orange red yellow and black watercolor background


Tissue and Contact Paper Trick or Treat Bag

This bag is a lot of fun for younger kids or kids you enjoy a more sensorial art process! They will get to rip up tissue paper, toss it onto the contact paper, and pat it all down with as much gusto as they like!

All you need is contact paper, tissue paper in a variety of colors, and some white acrylic craft paint. The paint is for the spider web, but if you don't want to use paint, another option is to cut out a paper spider web in the same way you would make a paper snowflake (Spider Web Kirigami).

Cut out a piece of contact paper slightly larger than the bag.

Colorful shades of tissue paper, contact paper and white acrylic craft paingCutting contact paper to fit a white craft bag

There are a few ways you can attach the contact paper to the bag at the end of the art making process. I opted to fold the contact paper over the edges of the bag to secure it to the bag. Therefore, I needed to cut the contact paper around the hand straps of the bag.

Cutting contact paper down to size around white craft bagWhite craft bag and contact paper

Remove the backing of the contact paper and place it over the bag with the sticky side up.

Paint a spider web on the sticky side of the contact paper (the contact paper was placed on top of the bag so I knew how big I needed to make the spider web). Allow the paint to dry.

White craft bag and contact paperPainting a white spider web on the sticky side of the contact paper

Tissue paper time! Have your kids rip up the tissue paper.

For younger kids, secure the contact paper to a table with a little tape. Sticky side still up, cover the contact paper with the bits of tissue paper.

Beautiful bits and pieces of torn up colorful  tissue paperSticking colorful pieces of torn up tissue paper to contact paper with a white spider web painted on it

Pat all the tissue paper down to make sure it is all sticking to the contact paper.

Secure the contact paper to the bag. As I mentioned before there are several ways to do this:

  • Use the excess contact paper around the border to fold it over onto the bag (this is what I did and could probably be done successfully with older children. You just have to leave some free space -- no tissue paper -- around the edges of the contact paper).
  • Cut the contact paper down to size and tape it onto the bag around the edges.
  • Cut the contact paper down to size and spread glue all over the tissue paper and glue it to the bag.
The 2nd and 3rd options are easier when doing this project with younger kids because they will cover every inch of the contact paper with tissue paper.

Colorful pieces of torn up tissue paper stuck to contact paperTrick or treat bag made with shades of purple and green tissue paper with a white painted spider web

Add the spider and maybe some letter stickers!

Attaching a cute black pom pom spider with googly eyes to a trick or treat bag

Trick or treat bag made with shades of purple and green tissue paper with cute black spider on a white web with large orange letters spelling trick or treat


Pom Pom Spiders

For the pom pom spiders you will need one pipe cleaner (chenille stem), one large pom pom (spider's body), one small pom pom (spider's head), googly eyes, and a piece of yarn or string. You can also use bits and pieces of left over felt to make any additional embellishments to fancy up the spider.

Black pom poms, black pipe cleaner chenille stem, googly eyes

Cut the pipe cleaner into 8 pieces of equal length. These are the spider's legs.

Taking the big pom pom, open up it up and apply hot glue to that area. Push 4 of the legs into the hot glue and close up the pom pom, giving it a gently squeeze. Repeat on the opposite side.

Black pom poms, black pipe cleaner chenille stem, googly eyesattaching pipe cleaner chenille stem legs to black pom pom

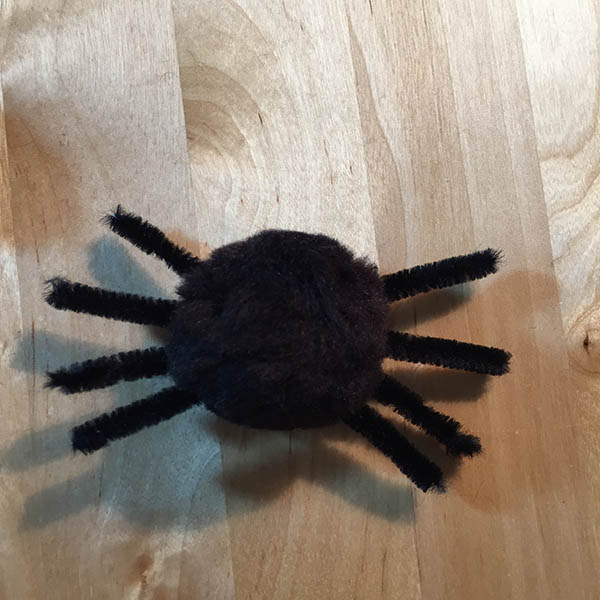
The spider's body is ready!

Apply some hot glue to the small pom pom and attach it to the body.

black pom pom spider body with legscute black pom pom spider

Glue on the googly eyes.

If you like, add some felt embellishments.

cute black pom pom spider with googly eyesCute black pom pom spider with pink felt spots and googly eyes

Open up the pom pom at the spider's bottom. Apply a dot of hot glue to it and glue the yarn or piece of string in place. Close up the pom pom and give it a gently squeeze.

Attaching black yarn to cute black pom pom spider with pink felt spots

The spider is ready for its web!

Cute black pom pom spiders with googly eyes and felt embellishments to make crowns, spots and hearts. King queen princess prince spiders

Cute black pom pom spiders with googly eyes and felt embellishments to make crowns, spots and hearts. King queen princess prince spiders

Have a very happy and safe Halloween!!!