I love mythology! One of my most vivid memories as a child is visiting a 2nd hand book shop and purchasing Edith Hamilton's classic Mythology: Timeless Tales of Gods and Heroes for 10 cents. I devoured it and continued to read it consistently over the years. It is one of the books that I made sure was in my suitcase on every one of our many many moves.
A few months ago our daughter showed a sudden interest in space, planets, rockets, and stars and we all got into it really quickly! We have been on a bit of an astronomy binge ever since! And it definitely has been an exciting year to follow space news, with the New Horizons' Pluto flyby, the recent Perseid meteor shower, the "supermoon" eclipse this past weekend, and the discovery of water on Mars.
I've been loving reading about the constellations and planets and remembering the myths behind the names. On the opposite end of the spectrum, my husband has been having loads of fun locating the constellations and planets in the sky. I've always said we complement each other in our tastes extremely well!
I wanted to make a play telescope for our daughter to "observe" the individual constellations as well as project them onto the wall (our daughter loves any activity that involves a flashlight!). Looking around on Pinterest I found a Paper Tube Telescope Craft at Kids Activities Blog and an Oatmeal Container Planetarium from the Relentlessly Fun Deceptively Educational blog. The combination of both would be exactly what I wanted, so I excitedly started planning and designing!
What I came up with was a telescope with a card holder at one end to change out constellation cards. Each star of a constellation is a hole in the card so light can pass through. The first time my daughter looked through the toy telescope, her reaction was, "This is amazing!!!" (that made my day!) and she has been requesting it at bedtime every night to "play with the stars" before her bedtime story.
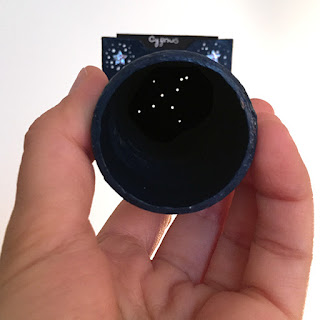
The constellations can be viewed by looking through the telescope:
Or by projecting them onto the wall of a dark room by shining a flashlight through the open end of the telescope (these pictures were taken using my Iphone as a flashlight!):
The materials you will need to make this telescope are:
- A sturdy cardboard tube (I used a tube I had left over from my Tulle Tutu Tutorial)
- A cereal box
- White glue and hot glue
- Black card stock
- Push pin
- Acrylic paint and stickers for decorating
The most involved part of the telescope is making the card holder. My tendency is to be very meticulous and methodical, so I always take a lot of process pictures to document every single step. This can sometimes make a craft seem harder than it actually is! Believe me, it's just me feeding my little monster who begs me for more details! I say this because when I started writing this post I was astounded by how many pictures I had! The whole thing didn't take more than 2 hours to do...
So, now that I have you all excited for the process pictures, here we go!
1 - Open the cereal box and flatten it.
2 - Place the cardboard tube on the cereal box.
3 - Outline the tube onto the cereal box. The tube I used is 2 mm thick. If you are using a thick tube like mine, outline the inner perimeter of the tube as well. The thickness of the tube makes a difference when connecting the card holder to the tube.
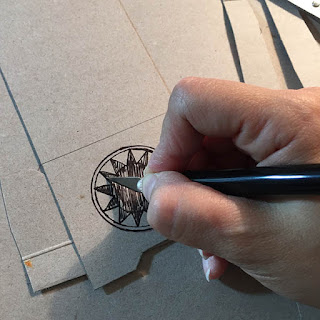
4 - Draw a series of triangles around the inner perimeter (the area colored black will be cut out in a later step). These triangles will be used to glue the card holder to the tube.
Decide how large you want the card holder to be and outline its area with the circles somewhat centered in the middle of the card holder.
5 - Extend the sides of the card holder outline farther up to at least twice its original height.
6 - Cut out the card holder. Then, using an X-acto knife, cut out the black area.
7 - This is what the card holder should look like after Step 6.
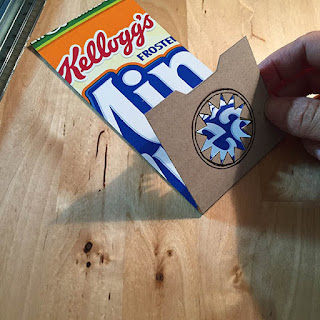
8 - Fold the card holder over itself.
9 - We will now trim the card holder down to size. Start by tracing the top of the card holder.
10 - Cut off the excess cardboard.
11 - The constellation cards will need a little bit of room to easily slide into and out of the card holder. To provide this room, we will create space by using two strips of cardboard cut from the cereal box. The strips (spacers) should be roughly the same height as the card holder but not too wide. There should be plenty of space between the spacers and the circles at the center of the card holder. Set the spacers aside.
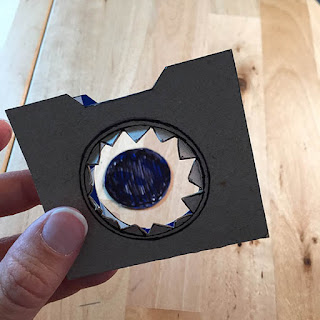
12 - Gently fold the triangles upwards, away from the card holder.
13 - Trace the perimeter of the inner circle onto the back of the card holder.
14 - This circle will be cut out.
15 - Cut out the black circle.
16 - Glue the spacers to the inside of the card holder.
17 - Glue the top of the card holder onto the spacers. The card holder is ready!
18 - Before connecting the card holder to the tube, I made a quick template for the constellation cards by tracing the card holder onto a piece of paper and reducing its width to account for the spacers.
19 - Just checking to make sure the template fits!
20 - Now let's glue it! Spread some white glue onto the triangles.
21 - Glue the triangles to the inside of the cardboard tube.
22 - For added strength, I flipped the tube over and ran my hot glue gun around the base of the tube where the card holder connects to it. The card holder was very firmly connected to the tube after these two gluing steps. At this point, the telescope is essentially done!
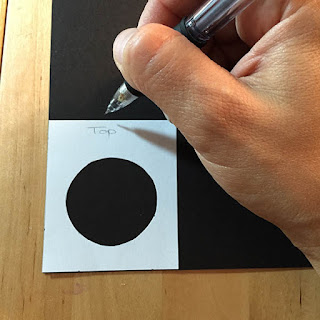
23 - Now onto the constellation cards! Trace the card template onto the black card stock.
24 - Trace it as many times as the number of constellations you want. Cut them out. Important: Only cut out the rectangle, do not cut out the circle.
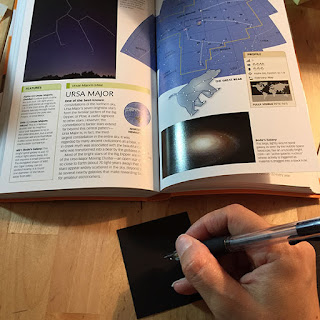
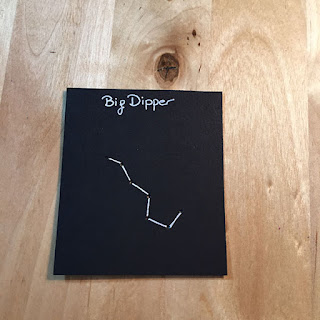
25 - Draw the constellation INSIDE the circle on the card stock.
26 - Mark each star of the constellation with a little circle and write the name of the constellation at the top of the card with a white gel pen.
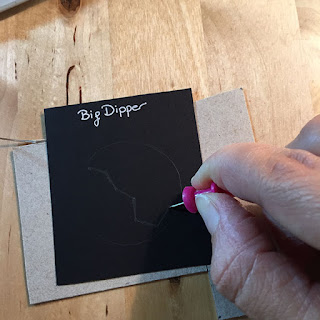
27 - Using a push pin, push it through the card stock only at the star locations.
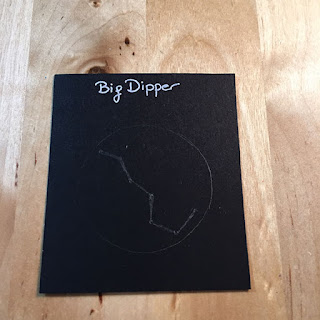
28 - The Big Dipper!
29 - Erase the circle and connect the dots with a white gel pen.
30 - Testing and success!
31 - Now comes the fun part, decorating it! I recruited my daughter to paint her telescope. It started out pink, then it was purple, and finally she settled on a dark blue. It had a lot of paint on it!
32 - We added some silver star stickers and later I painted on some constellations. I sealed everything with a layer of Mod Podge. All done!
One last thing... Using the flashlight on my Iphone resulted in a really crisp projection of the constellations onto the wall (as I showed up at the beginning of this post). However, when I tried a small handheld flashlight I got a lot of halos around the stars:
This is due to the light bouncing all around from the flashlight's reflective interior. To fix this I punched a small hole through the center of a small piece of cardboard or card stock. I then taped this piece of card stock to the flashlight. Problem solved, now the projections looked just like the ones using the Iphone.
If you'd like to dedicate a flashlight solely for this project, another option is to paint the reflective surface on the inside of the flashlight black. Instructions at Handmade Charlotte.
Some great books for kids and big kids:
- We got our daughter the National Geographic Kids First Big Book of Space and it quickly became her favorite book! It is geared toward 4 to 8 year olds.
- We also purchased Child's Introduction to the Night Sky: The Story of the Stars, Planets, and Constellations -- and How you Can Find Them in the Sky. This book is for older children (8 to 13 year olds) but I couldn't resist getting something to introduce her to the myths behind the names of the objects in the sky. I haven't had time to get into this yet but I hope to soon!
- We also have Zoo in the Sky: A Book of Animal Constellations. Our daughter loves animals and the illustrations in this book are just beautiful! It has short whimsical stories about the animal constellations and the names of some of their most important stars. This book is intended for children between the ages of 6 and 9.
- The DK Smithsonian Nature Guide: Stars and Planets is packed full of information for budding amateur astronomers.
Additional activities from around the web:
- While the weather's still nice up here in the Northern Hemishpere, kids can make constellations using rocks and sidewalk chalk. Instructions at Creekside Learning
- A nice quiet hands-on activity using mini-marshmallows and toothpicks to make the constellations. Instructions at Edventures with Kids
- Construct the constellations with star stickers and chalk on black construction paper. The mom even let the kids turn her into a constellation with some left over gold star stickers. Love her! Instructions at Gift of Curiosity













No comments:
Post a Comment